New To iPiccy? Basic Features Overview
With the wide selection of image editors available on market today, there is no excuse for failing to develop your pictures properly. Online image editors are developing a new trend for those users who either can’t or don’t want to spend money on a professional image editor such as Photoshop, but who still want something that gets them fairly similar results.
If you ask somebody about online image editors, they would probably mention Pixlr… wrong end, in this case. A good image editor needs to be capable of delivering as many tools as traditional image editors do, therefore adding nice looking presets to your image doesn’t cut it to be considered a good image editor.
But if you ask me, “Do you know a good image editor?” I would answer, “Do you know iPiccy?”
Little by little, iPiccy is finding its place in the digital media industry, proving that it can be an amazing tool, editing pictures with the best of them. Not only that, but it’s free! – What else could we ask for? Yes, it’s right here in black and white, free for all kind of usages you may want it for, even commercial photography. Providing as many tools as most common image editors available, iPiccy does the task of editing your pictures, wherever you may be. Now, not having a good pc for installing the proper image editor is no longer an excuse. With iPiccy, all you need is an internet connection, a compatible browser (like Google Chrome for its java support in order to avoid crashes) and enough creativity to make the best of each of your images.
Let’s start!
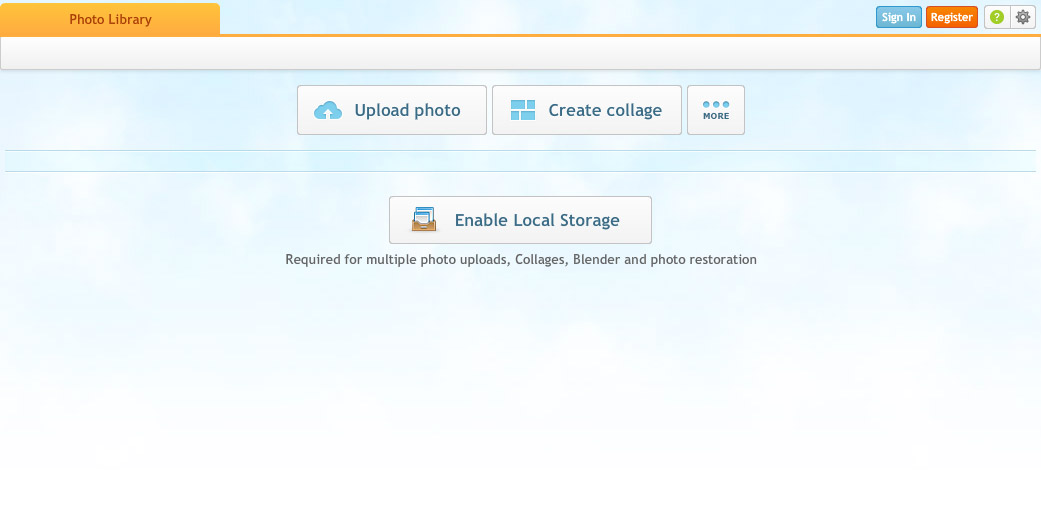
When you open up your session, you will find yourself at the Photo Library section, were all of your pictures, uploaded as well as developed, are stored. Enabling the Local Storage is recommended, but in this case I am going to upload a picture in order to work with it. You can also create collages with this versatile tool.
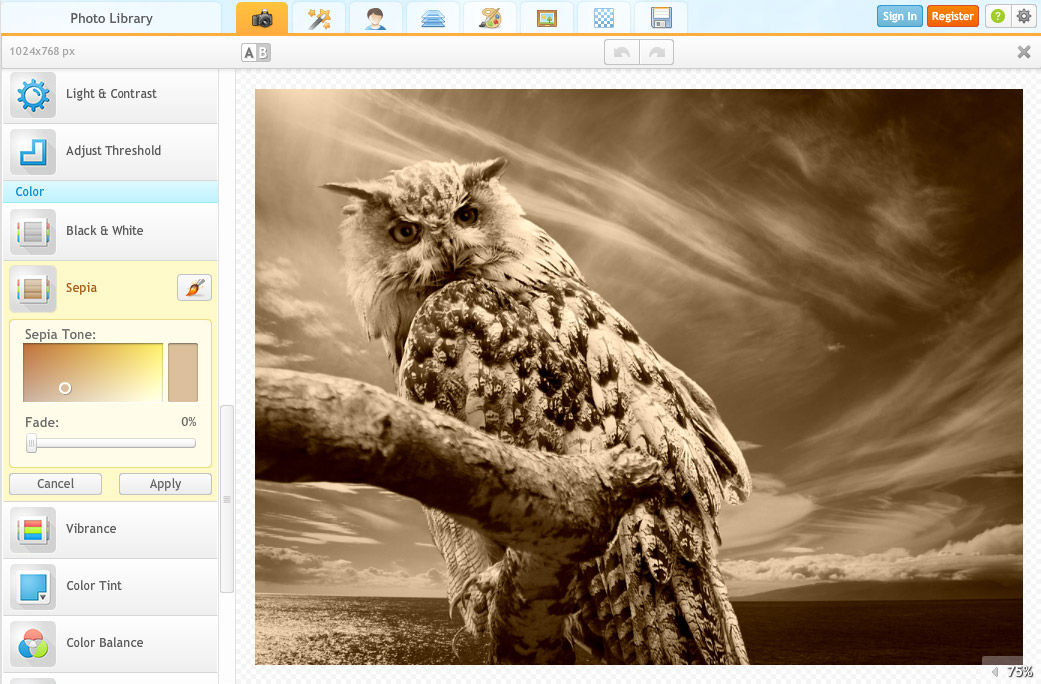
After loading the picture, notice the structure of the user interface. It is divided into several modules for different kinds of tasks. The Basic editor, who is also the default module, provides as many tools as most common image editors. They are easy to use, and you will soon find yourself adjusting your pictures with these tools.

- Fix Image: iPiccy will do an auto-tune for you. If your image is not too bad, you may not notice any huge changes, but for underexposed pictures, this works like magic!
- Resize image: For resizing purposes. Please notice that this tool doesn’t have an automatic method, so you don’t notice the pixelated effect when increasing size, the way some image editors do.
- Crop picture: For cropping your picture. Provides several templates, such as Instagram and Twitter/Facebook cover as Constraint options.
- Rotate and Flip: Quite easy to use, using either the Slider for precise angle, or with the buttons for common 90 degrees rotations.
- Exposure: Controls Exposure, Highlights, Shadows and Contrast
- Colors: For managing hues in the scene.
- Hue & Saturation: Controls Hue, Lightness and Saturation, as well as providing tools for masking the adjustment to selected areas.
- Sharpen: For adding detail. Also provides a Clarity tool for recovering dark areas in the picture.
This module also provides several other tools such as quick tint adjustment (for changing into B&W, Sepia, etc.), as well as providing advanced tools like Curves Adjustments, Dodge and Burn, Background eraser, and so on.
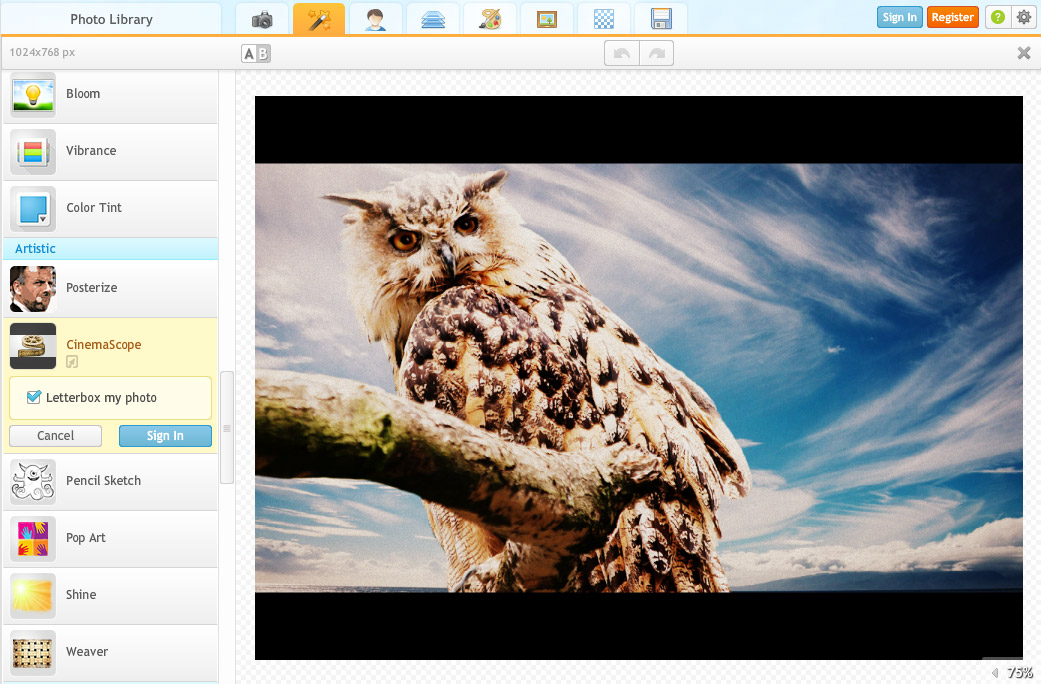
The second module, represented by a magic wand, is the Photo Effects module. In this we can apply presets almost in the same fashion as applications like Instagram, only with more variety and control for the user.
Notice that these filters are labeled and sorted into different categories, making them easy for the user to find. Some filters even affect the shape of the image, such as the CinemaScope used in the image below.
The third module is the Retouch module, which works with several tools, stacked in the very same fashion of previous modules, but these tools work with a combination of sliders that adjust the intensity of the tool itself, as well as a brush for applying the changes wherever we need or want them.
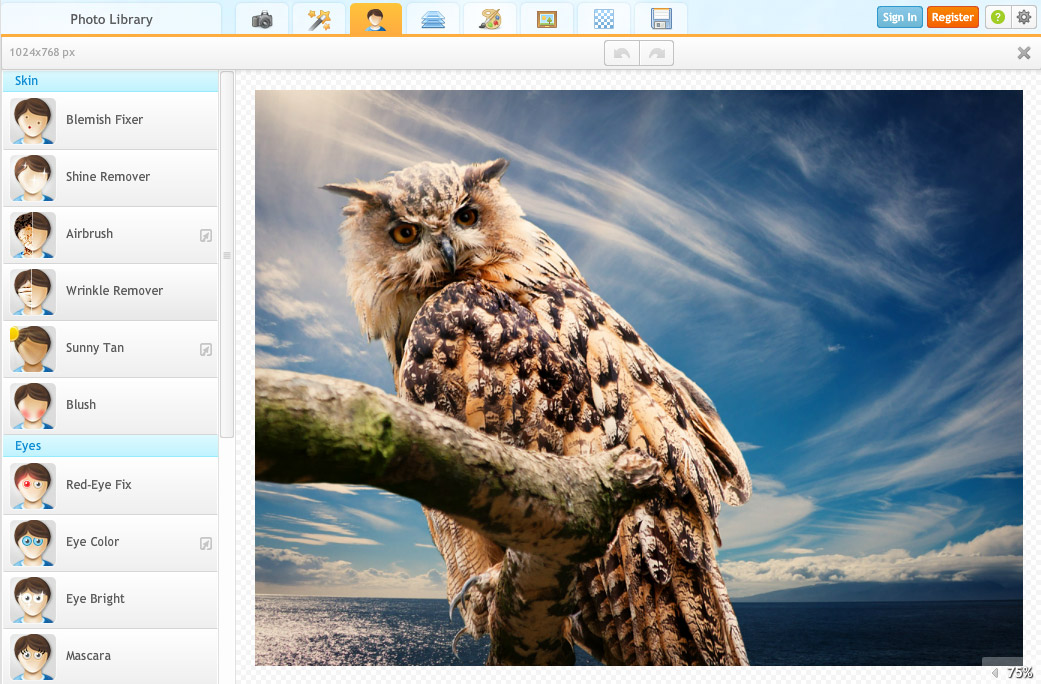
Tools are categorized under the following options:
- Skin retouching (removing blemishes, sun tanning, etc.)
- Eyes retouching (red eye removal, eye color changer, etc.)
- Mouth retouching (teeth whitening, lip color)
- Body retouching (known as The Rest)
- Advanced tools (Clone and Liquefy)
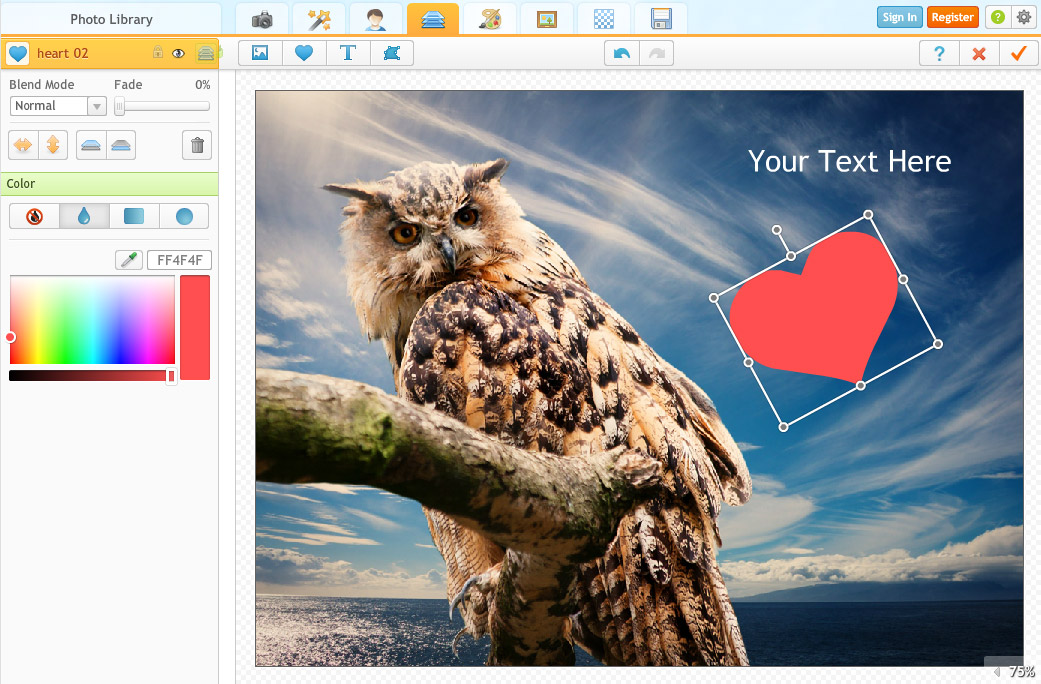
Next, follow up with the Blender module, where we can add multiple layers of photos, texts, stickers, etc.
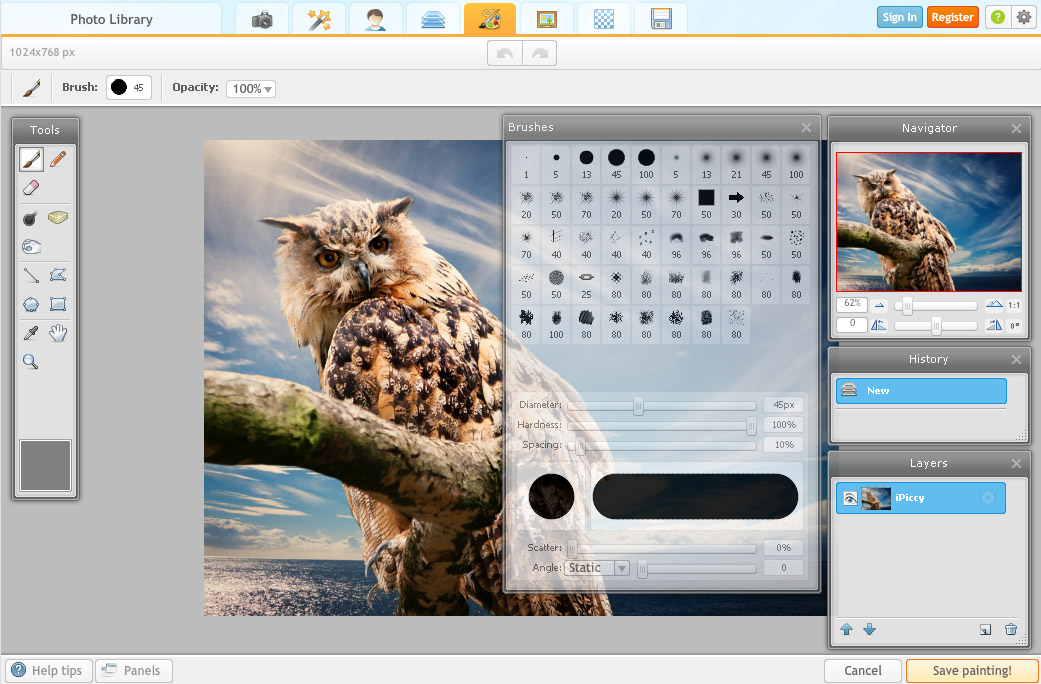
The painter module works for creating artistic effects into our pictures. It provides several options for brush tips as well as tools like Sponge, Dodge and Burn.
The frames module is meant for finishing up our work, providing several frame templates we can use, such as this stunning Snowflakes frame.
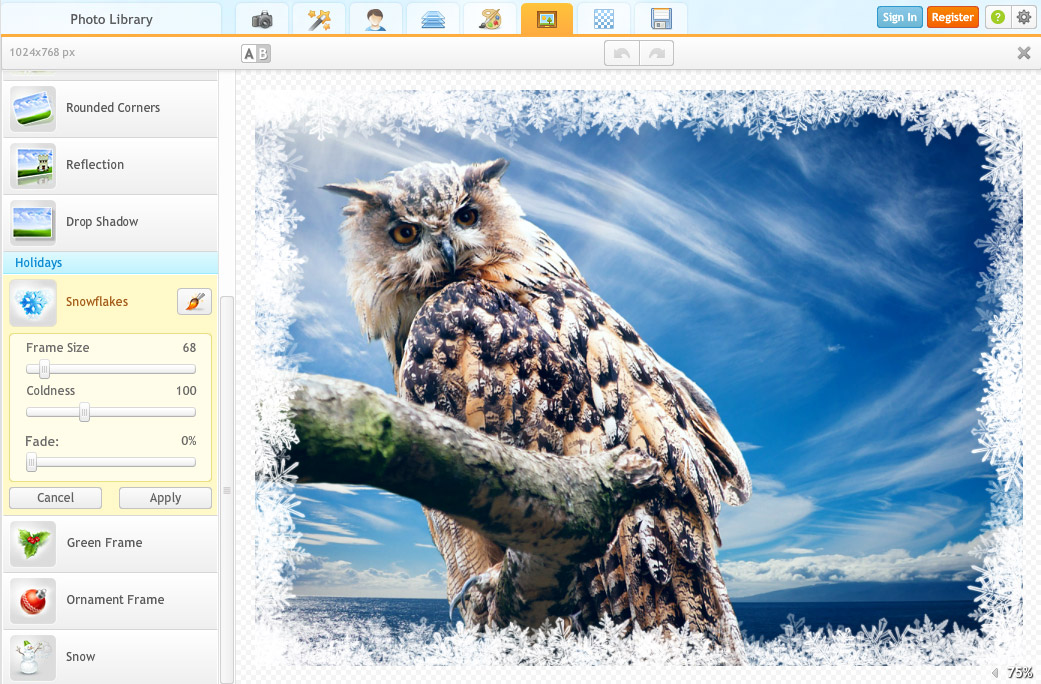
Notice that some of these templates also alter the tint of the image, for example this Snowflakes that I used; the image had a Sepia tint and ended up being nearly a Black & White image.
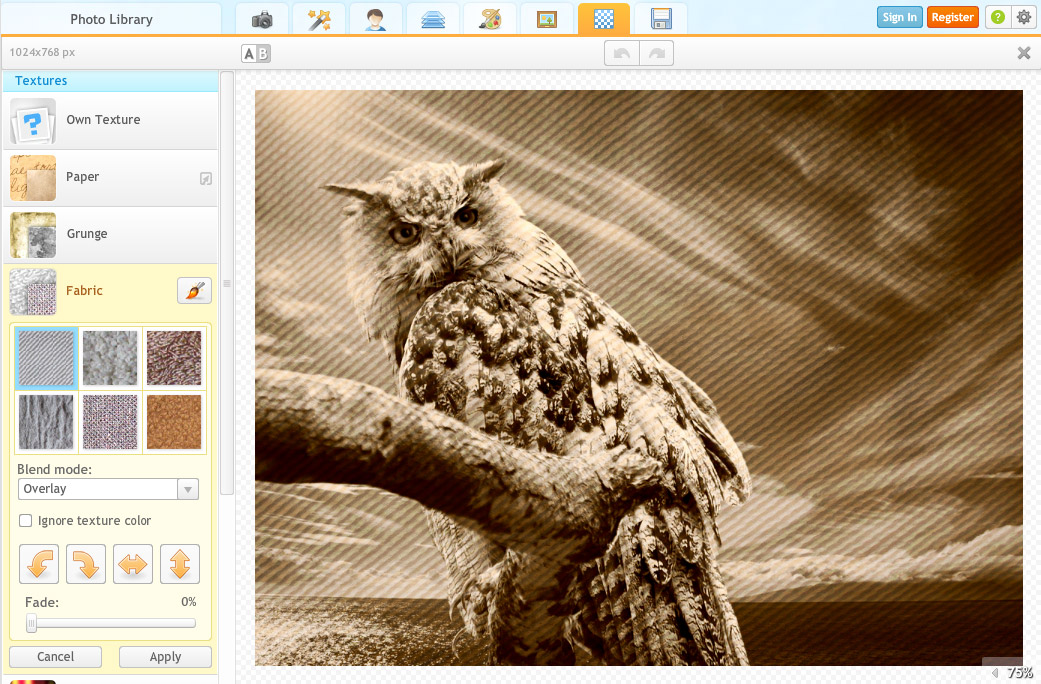
The last editing module is the Texture module, where we can texture the picture as though it were painted on canvas. There are several options for textures available for the user, so you won’t run out of options while using iPiccy.
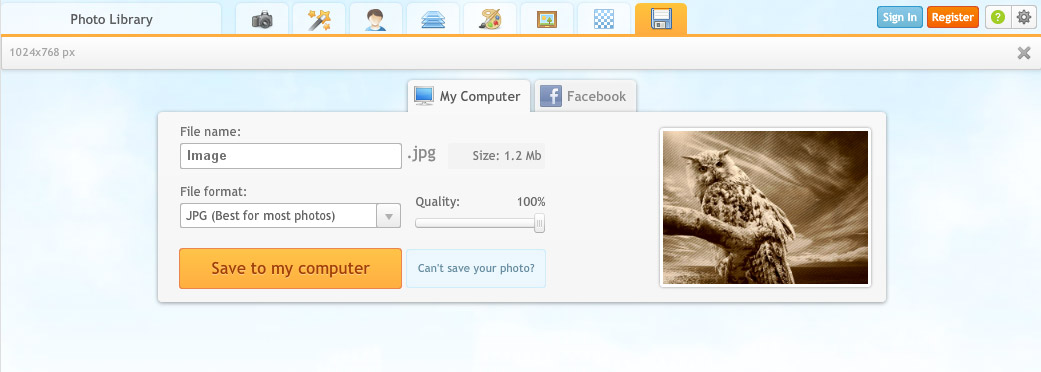
Finally, there is the Save module, where we can save the picture to our pc or share it via Facebook. Formats for saving the pictures to pc are JPEG or PNG, allowing users to determine the final quality of the image, which will also affect the final file size.
As you can see with this Before/After image, our photo changed a great deal with the help of iPiccy, meaning that now there is no excuse for not developing your pictures the proper way. Say goodbye to the days of old dull and boring pictures, and let iPiccy change your digital photography workflow!